How to Vectorize an Image in Illustrator
Understanding Vectorization
Before diving into specific methods, let's explore what vectorization is and why it's important.
What is Vectorization?
Vectorization or tracing is the process of converting raster images (composed of pixels) into vector graphics (made up of paths and mathematical formulas).
This conversion allows images to be scaled infinitely without losing quality, making them ideal for various design applications.
Why Vectorize Images?
- Scalability: Vector images can be resized without losing quality, perfect for logos and graphics used in multiple sizes.
- Editability: Vector graphics are easier to modify and customize.
- Smaller file sizes: Vector files are often smaller than high-resolution raster images.
- Print quality: Vectors ensure crisp, clear printing at any size.
- Versatility: Vector graphics can be easily converted to various file formats.
Common Vectorization Methods
There are several approaches to vectorizing images, each with its own advantages:
Manual Tracing
This involves manually recreating the image using vector drawing tools. It's time-consuming but offers the most control over the final result.
Automated Tracing
Softwares like Adobe Illustrator uses algorithms to automatically trace raster images and convert them to vectors. This method is faster but may require fine-tuning.
AI-Powered Vectorization
Advanced tools like vectorizer.kiwi use artificial intelligence to analyze and convert images, often producing high-quality results with minimal user input.
Hybrid Approach
Combining automated tracing with manual adjustments, this method balances efficiency with precision.
Now, let's explore two specific methods for vectorizing images:
Method 1: Vectorizing in Adobe Illustrator
Adobe Illustrator provides a feature called Image Trace that allows you to convert raster images or sketches to vector art.
Here's how to use it:
- Place Your Image: Start by placing your image (JPEG, PNG, PSD, etc.) within your Illustrator document.
- Select the Image: Use the Selection tool to select your placed image.
- Access Image Trace Tool: Tap the Object panel and select Vectorize to convert the raster image to vector.
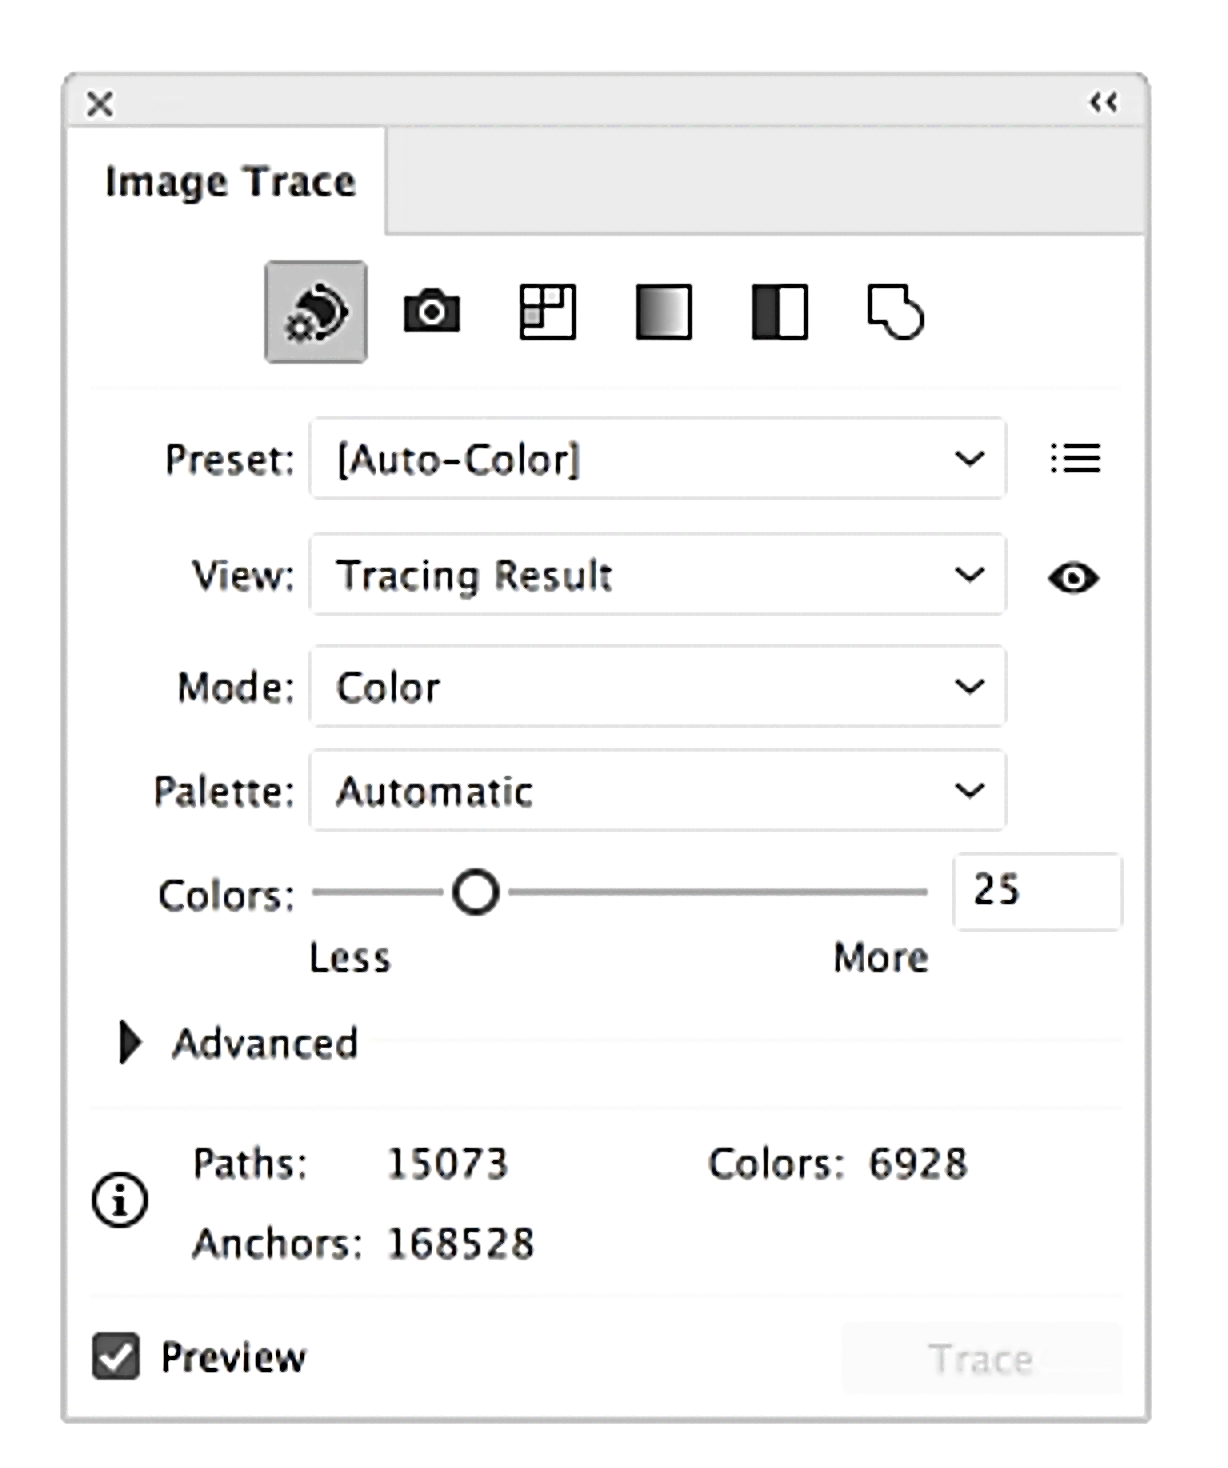
- Customize Image: Trace Options Select the image and tap the Properties panel on the taskbar to access Vectorize options. Here are some key settings you can adjust:
- Source: Auto-detects or lets you specify the image type (Sketch, Line Art, Logo, Painting, or Photograph).
- Color mode: Choose between Color, Grayscale, or Black and white.
- Colors/Grayscale/Threshold: Adjust based on your chosen color mode.
- Path: Controls the distance between the vectorized shape and original pixel shape.
- Corners: Determines the emphasis on corners.
- Noise: Specifies the area in pixels to ignore when vectorizing.
- Output: Choose between Fills or Strokes.
- Abutting/Overlapping: Determines how paths interact.
- Ignore white: Replaces white fill areas with no fills.
- Expand Vectorization: After adjusting the properties, tap "Expand vectorization" to convert the object into editable vector art with fills, strokes, and paths.
- Edit Your Vector Art: Now you can ungroup the object and edit it using shape tools, colors, and other Illustrator features.
Tips:
- Use the Undo button to discard changes at any point.
- Widget controls on the canvas offer quick access to Vectorize and Expand vectorization options.
- The Expand vectorization option is also available in the Object panel.
Method 2: Using vectorizer.kiwi - A Free and Easy Alternative
While Illustrator offers extensive control, it requires software expertise and can be time-consuming. For a simpler solution, consider vectorizer.kiwi:
- Visit vectorizer.kiwi: Go to the vectorizer.kiwi website in your browser.
- Upload Your Image: Drag and drop your image onto the site or use the upload button.

- Automatic Vectorization: The AI-powered tool will automatically process your image, converting it to a vector format.
- Download Your Vector: Once processing is complete, download your vectorized image in SVG format.
Benefits of using vectorizer.kiwi:
- No software installation required
- User-friendly interface
- Fast and efficient conversion
- High-quality output
- Handles complex images with ease
- Free to use
Conclusion
While Adobe Illustrator offers powerful vectorization tools for those with software expertise, vectorizer.kiwi provides a fantastic alternative for quick, high-quality vector conversions without the learning curve. Whether you're a seasoned designer or new to vector graphics, both options offer valuable solutions for your image vectorization needs.
Choose the method that best fits your skill level, time constraints, and project requirements!